Sage 100 ERP: How To Create a Custom Lookup In Sage 100 ERP
267-614-6148
Almost all data entry screens in Sage 100 ERP contain a lookup. For example, Customer Maintenance contains a lookup for the customer number. If you press the lookup icon (magnifying glass), you are able to view a listing of all your customers. The standard lookup contains the customer number, customer name, zip code and phone number.
You can customize this lookup panel meet your needs. You can change the fields that are displayed, and you can even add calculated data fields to the lookup. By customizing the displayed data, you can create “mini” reports to give you information almost instantly.
You can also export your customized lookup list to Excel.
How To Video Here
Steps to customize a look up:
1. Open the task that contains the lookup you wish to customize. Click on the magnifying glass icon for the lookup. This will bring up the standard lookup.
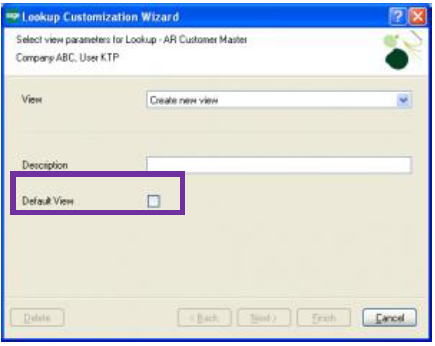
2. Press the custom button. The lookup customization wizard will be displayed.
3. Enter a description for your customized look up, be sure to check ‘default’ if you would like this to be the first view that is displayed. A dialog then displays all available fields for the lookup.
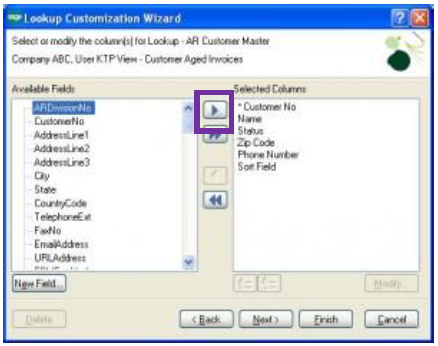
4. Select the fields you want in your customized lookup by choosing from the available fields and moving them to the selected columns by double clicking or by highlighting and pressing the arrow which points to the right.
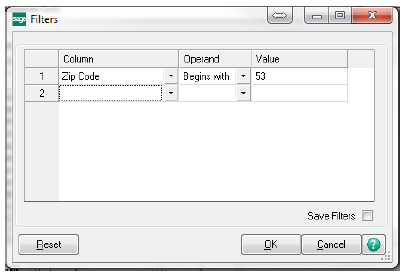
5. A filter can be set as a default for a custom lookup as well. For example, you could select to see only customers that have zip codes that start with “53”.
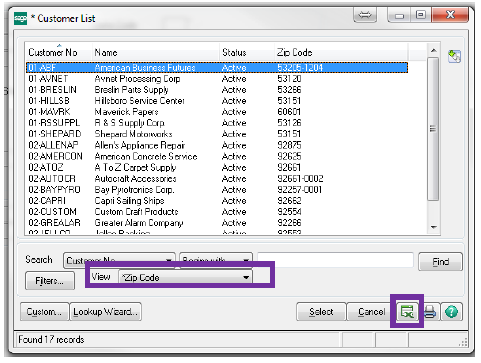
You will now notice that there is a ‘view’ drop-down on your list screen. This enables you to change back to the ‘standard’ view or any of your custom lookups with ease. To export the lookup listing to Excel, press the Excel icon in the lower right corner.


Comments
Post a Comment